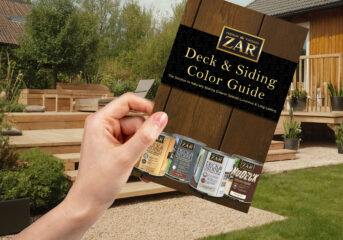
As the crisp autumn air ushers in fall, it’s the perfect time to set up a cornhole game in your backyard. Cornhole, a classic outdoor game, is ideal for gatherings with friends and family. In this blog, we will walk you through building a durable and stylish cornhole board and explain how to finish it with Zar Deck and Siding Stain to withstand the fall elements and look great for years to come.

Materials and Tools
Materials:
- 2 sheets of 4×2 ft. plywood (for the boards)
- 4 2x4s (for the frame)
- 4 3÷8” plywood screws
- Wood glue
- Sandpaper (80, 120, and 220 grit)
- Paint (optional, for the design)
Tools:
- Circular saw or jigsaw
- Drill and drill bits
- Screwdriver
- Paintbrushes or rollers
- Measuring tape
- Pencil
For Finishing:
- ZAR Deck and Siding Stain
- Clean rags or brushes for application
- Drop cloth or plastic sheeting
Step 1: Cutting the Wood
- Cut the Plywood: Start by cutting the plywood into two 4×2 ft. rectangles. These will be the surface of your cornhole boards.
- Create the Frame: Cut the 2x4s into the following pieces:
- Four pieces at 24 inches (for the sides)
- Four pieces at 45 inches (for the long sides)
- Cut the Hole: On each plywood board, measure and mark a 6‑inch diameter circle centered 9 inches from the top edge and 12 inches from each side. Use a jigsaw to cut out the hole.
Step 2: Assembling the Board
- Build the Frame: Assemble the frame using the 2x4s. Arrange the pieces into a rectangular frame and secure the corners with wood screws and wood glue.
- Attach the Plywood: Place the plywood rectangles on top of the frame. Secure them with wood screws, making sure to pre-drill the holes to prevent splitting.
- Sand the Surface: Sand the edges and surface of the plywood board, starting with 80 grit and progressing to 220 grit. This will ensure a smooth surface for both the game and the finish.

Step 3: Painting (Optional)
- Design the Board: If you want to add a personal touch or team logos, use outdoor acrylic paint. Apply a primer first if needed, then paint your design. Allow it to dry completely before moving on to the stain.
Step 4: Applying Zar Deck and Siding Stain
- Prepare the Area: Set up your workspace on a drop cloth or plastic sheeting. Ensure the boards are clean and dry.
- Apply Stain: Using a clean brush or roller, apply Zar Deck and Siding Stain (Zar® Exterior Wood Stain, Finishing & Sealant Quality Products) to the cornhole boards. Follow the manufacturer’s instructions for application and drying times. Usually, you’ll need to apply two coats, allowing adequate drying time between coats.
- Let it Dry: Allow the boards to dry completely in a well-ventilated area. This may take up to 24 hours depending on the weather conditions.
Step 5: Final Touches
- Check for Any Issues: After the stain is dry, inspect the boards for any missed spots or imperfections. Touch up as needed.
- Add Feet (Optional): For added stability, you can attach rubber feet or small blocks to the bottom of the frame.
- Set Up and Play: Position your cornhole boards in your desired location and get ready for some fall fun!

Tips for Longevity
- Cover Up: When not in use, cover the boards to protect them from the elements.
- Regular Maintenance: Reapply Zar Deck and Siding Stain every few years to maintain the boards’ appearance and durability.
Conclusion
Building and finishing your own outdoor cornhole boards is a rewarding project that adds a fun and functional element to your backyard gatherings. By following these steps and using Zar Deck and Siding Stain, you ensure your boards will not only look great but also stand up to the wear and tear of seasonal play. Enjoy your fall festivities with a game that’s as durable as it is enjoyable!
Feel free to share your own cornhole board designs and finishing tips in the comments below. Happy building and playing!


