Step-by-Step Guide to DIY Furniture Projects
Revamping your home’s look with new furniture can often come with a hefty price tag. But if you’re on a budget, fear not — there are plenty of alternatives! Scouring your local Facebook Marketplace or keeping an eye out during curbside cleanups can be a goldmine for great pieces that need a little love. With the right tools and finishes, you can transform these hidden gems into exclusive, custom pieces that perfectly match your home’s décor, all without breaking the bank.
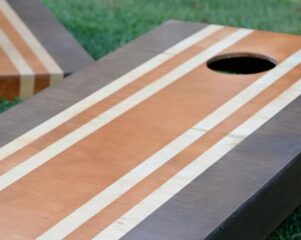
One of the best ways to breathe new life into old furniture is by using ZAR Interior Wood Stain and ZAR finishes. These high-quality products help you achieve a professional, durable finish that rivals store-bought options. Follow this step-by-step guide to tackle your DIY furniture projects and create beautiful, one-of-a-kind pieces.

Step 1: Find Your Furniture Treasure
Before you start the staining and finishing process, find a piece of furniture worth restoring. Facebook Marketplace is a great place to start. Whether you’re looking for a vintage dresser, a side table, or an old bookshelf, look for well-made furniture that just needs a little TLC.
If you’re lucky enough to stumble upon curbside cleanups in your neighborhood, don’t hesitate to stop by and see what’s available. You’d be surprised at the high-quality furniture people are throwing away! Check for solid wood pieces that might need a fresh coat of paint or a good sanding.

Step 2: Prep the Piece
Once you’ve secured your furniture, it’s time to prepare the surface for finishing. The first thing you’ll need to do is clean the piece thoroughly to remove any dust, dirt, or grease. Use a gentle cleaner and a soft cloth to wipe down all areas.
Next, inspect the surface for imperfections. Sand down any rough spots or blemishes using sandpaper or a power sander. This step is crucial for achieving a smooth finish, so pay attention to areas where old paint, stain, or varnish may still be present. If the piece has any deep gouges or scratches, use wood filler to patch them up before sanding again.
Step 3: Stain the Wood
Now that the surface is clean and smooth, it’s time to apply ZAR Interior Wood Stain. ZAR is known for its rich, vibrant colors and ease of application. Choose a stain that complements the wood’s natural grain and suits your home décor. (step-by-step guide zar-color-card-product-guide.pdf)

How to Apply ZAR Wood Stain:
1. Stir the Stain: Before you begin, stir the stain thoroughly to ensure an even consistency. You may also want to test the stain on a small, hidden area of the furniture to ensure the desired color.
2. Apply the Stain: Using a clean cloth or a brush, apply the stain in long, even strokes, following the wood grain. Work in small sections to ensure that the stain doesn’t dry too quickly.
3. Let it Sit: Depending on the depth of color you want, let the stain sit on the surface for a few minutes. The longer the stain sits, the darker the result.
4. Wipe Off Excess: Wipe away any excess stain with a clean cloth after the desired time. Remove any drips or pools of stain to avoid uneven coloring.
5. Let it Dry: Allow the stained furniture to dry for several hours or as recommended on the can. This will ensure that the stain sets properly.
Step 4: Apply ZAR Finish for Protection
Once the stain has dried, it’s time to protect your work with a ZAR finish. ZAR offers a range of finishes, including both satin and gloss options, depending on the look you’re going for. A good finish will help protect the furniture from scratches, spills, and general wear and tear, especially for frequently used pieces.
How to Apply ZAR Finish:
Choose the Right Finish: Select ZAR’s Interior Wood Finish that suits your desired look. A satin finish gives a soft sheen, while a gloss finish will add a glossy, reflective look.
Apply the Finish: Using a clean brush or foam applicator, apply a thin, even coat of the finish over the entire piece. Work in sections to ensure that the finish goes on smoothly and evenly.
Let it Dry: Allow the first coat of finish to dry completely. This can take several hours depending on the humidity and temperature of your workspace. Make sure it’s fully dry before adding another layer.
Sand Between Coats: For a smoother finish, lightly sand the surface with fine-grit sandpaper (220-grit or higher) between coats. This step ensures that any imperfections are removed, and the finish will look flawless.
Apply Additional Coats: Apply 2 – 3 coats of ZAR finish, allowing the piece to dry completely between each coat. The more layers you apply, the more durable the finish will be.
Step 5: Let it Cure
Once you’ve applied your final coat of finish, let the furniture cure for at least 24 – 48 hours. This ensures that the finish is fully set and hardened, offering maximum protection.
Step 6: Style and Enjoy!
Now that your piece is dry and fully cured, it’s time to style it in your space! Whether it’s a vintage dresser, a refurbished nightstand, or an old bookshelf turned into a statement piece, your DIY project is now ready to shine. Place it in your living room, bedroom, or hallway, and enjoy the satisfaction of having a custom-made piece that reflects your unique style.

Why ZAR is the Perfect Choice for DIY Furniture Projects
ZAR finishes are a fantastic option for any DIY furniture restoration project. They provide excellent coverage, durability, and a professional look that can elevate any piece of furniture. Whether you’re going for a rich, dark stain or a more natural finish, ZAR products are designed to enhance the beauty of the wood while providing long-lasting protection.
With just a little bit of effort, you can transform a discarded or inexpensive piece into a high-end, exclusive addition to your home. The best part? You won’t have to break the bank to get that designer look!
So, next time you’re in the market for new furniture, consider looking for secondhand pieces and giving them a fresh, personalized makeover with ZAR finishes. It’s a sustainable, cost-effective way to create unique furniture that fits your style perfectly.